
Recipe for Success – Ingredients for Generating Image Descriptions with AI
Introduction
George was recently gifted a beautifully illustrated cookbook containing many wonderful bread recipes from around the world. While he was delighted to find the EPUB version on Bookshare, he was disappointed to discover that, aside from the cover, the alt text for every image was simply “Image.” Recognizing the potential of Fido to describe images in an EPUB, this presented a great opportunity to experiment with leveraging AI for generating the missing descriptions.
This document outlines the steps taken to generate image descriptions using AI, sharing the learnings from the process. It is important to note that the alt text chosen is not intended to serve as a model of best practice, but rather to illustrate the capabilities and limitations of AI.
Choice of AI model
At the time of writing Fido offered 18 models generative AI models from Anthropic, Google, OpenAI and xAI. I’ve used almost all of them during the course of my experimenting, including the very latest and Chat GPT-5 and Grok 4 models. I haven’t yet found cases where I need to use the more expensive (and energy intensive) models results. I chose to Google’s lightweight model which is responsive and inexpensive.
To select the model for describing images I navigate Fido / Settings / Alt service / Generate image descriptions using and I chose Google Gemini 2.0 Flash. I had already entered the API key, but for good measure I tested it again using Fido / Settings / Setup / Check Google.
A couple of tweaks before we begin
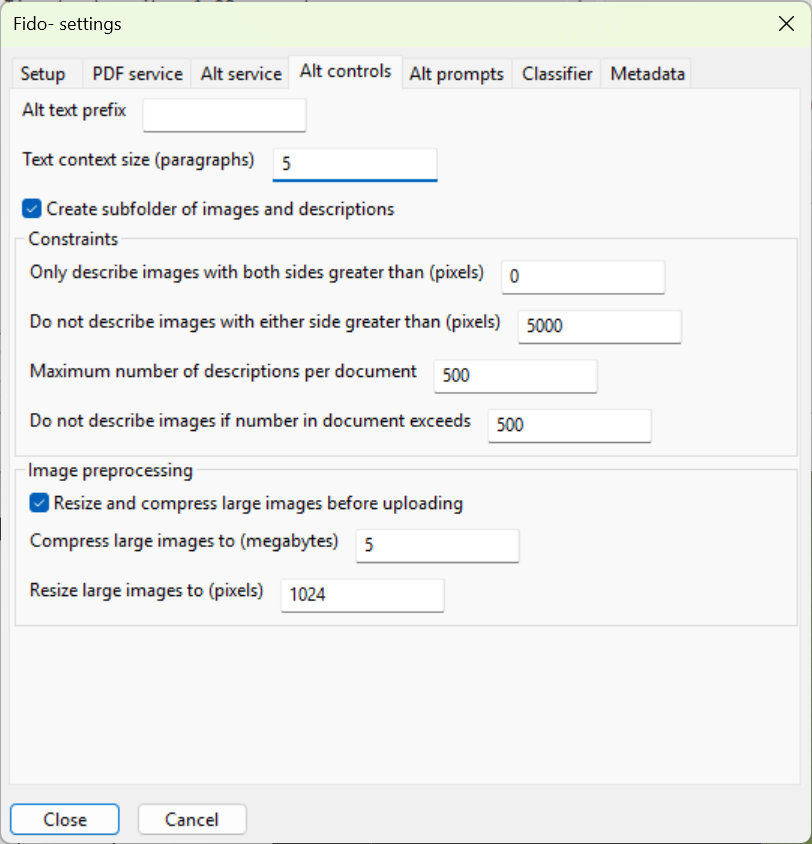
Having established that my connection to the Google API was successful, I proceeded to the Fido / Settings /Alt controls tab.
Fido has some constraints on the image description process, intended to help control costs. The parameters in this dialog were adjusted thus:
Alt text prefix: This is intended to help in a workflow where each of the image descriptions is reviewed and approved by a human. In this case, I’ll be doing this as we go, so I removed this string so that the resulting EPUB is usable.
Text context size: This determines the number of text paragraphs before and after each image that extracted by Fido. More on this later.
Create subfolder of images and descriptions: My workflow was to check the images and descriptions after adjusting the prompts, so I checked this box. A processing summary is also placed in the subfolder with information about the number of images, time taken, and costs, which was interesting (to me!).
Only describe images with both sides greater than: Adjusting this setting enables you to exclude small icons or embellishments that might be in your document. I wanted all the images described, so I left this as 0 pixels.
Do not describe images with either side greater than: Adjusting this setting enables you to exclude whole pages that have been inserted as images in error as part of a PDF conversion. Setting the value to 5000 meant that all the images were described.
Maximum number of descriptions per document: When trying the different prompts and AI models I did not always need to do the entire publication. Adjusting this value meant description finished after the first 50, say, and I could review the result. For the final production I put this number back up to 500.
Do not describe images if number in document exceeds: This is intended to help in an automated workflow and avoids runaway costs if a publication contains huge numbers of images (possible with a PDF conversion).
Image preprocessing: This EPUB contains many high-resolution photographs. The number of input tokens used by the process can be lowered by reducing the image size before uploading. I set the maximum values to 5 MB and 1024 pixels so that Fido will reduce the size of larger images.
Next, I checked the default prompt in the Alt prompts tab, which was set to the generic prompt that installed with this version of Fido:
You are an assistant trained to generate useful image descriptions for accessibility purposes.
Here are two examples of the output you should generate:
A woman prepares a meal at a kitchen counter, with vegetables, a cutting board, and an oven visible in the background.
A man is working at a desk with a desktop computer, surrounded by stacks of books and a coffee mug.
Provide a concise and descriptive alt text for the image using the given examples.
And with that, I’m ready to start generating the image descriptions.
Generating the Image Descriptions
From Fido’s main windows I chose Describe images’
Then Describe all the images in an EPUB button
After browsing and selecting the file, the process begins:
A progress window is displayed with an estimated time remaining. If the process is cancelled, then the descriptions to this point are written to the file. At the end of the process a completion dialog is displayed. I can choose to open the file (in the default application) or open the containing folder in File Explorer.
Once I close this dialog I am returned to the Image description dialog. The image description text can be reviewed in the scrollable edit area, where a processing summary is also displayed.
Fido writes the descriptions into the EPUB (or Word document or PowerPoint slide deck). In this exercise I wanted to keep the results of different attempts, so I made several copies of the original EPUB file and gave meaningful names. Remember that I checked that option to create the subfolder of images and descriptions? The subfolder is named after the EPUB filename, so I was able to compare the results in the folders and know which was which.
Results with the Default Prompt
After generating the image descriptions, I navigated to the created subfolder. All the images are extracted and placed in this folder, together with data about each image (this may be useful for analysis in some cases) and an HTML file with image description results. Opening this file in the browser results in a web page with the results presented in a table. In the table is a thumbnail of the image (it can be expanded by selecting it), the filename, classification, position in the publication, and description. The column headings can be selected to change the sort order, and you can search within the descriptions. It is also possible to filter by image classification, if you are using that feature. But more on that later.
Reviewing the results in this table gave me a good sense of the images description task for this book on baking. I could see that there are 317 images. Visually skimming through the table I could get a sense of the different image types, which were:
- a couple of cover images
- QR codes at many points through the text
- photographs of food and ingredients
- panels with a montage of images that demonstrate steps
- a timeline for each recipe
- some logos for the publisher and social media platforms
Tasty descriptions
More than half the images in this title were photographs of food. And my assessment was that the image descriptions generated with the default prompt were not acceptable. The food photography in a this book transforms it from a simple collection of recipes into a vivid, sensory experience. Each image not only tempts the eye and stirs the appetite. The descriptions generated with the generic prompt did little to convey the visual richness that makes the book a joy to browse for a visual reader.
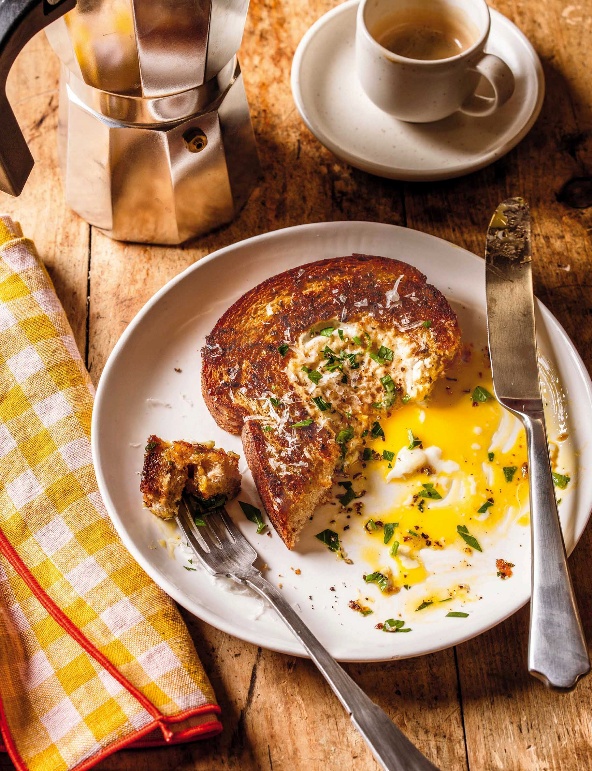
By way of example “A plate with a piece of fried egg in toast next to a fork and knife, with a coffee maker and a cup in the background” is factually correct but flat and uninspiring.
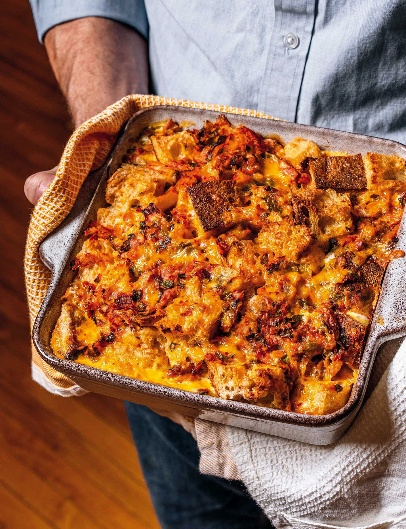
Same goes for “A person holding a casserole dish full of bread pudding with melted cheese and tomatoes”.
I decided to replace the default generic prompt with one that would generate image descriptions that were closer to the aesthetic goals of the rich and sensuous photographs in the book. I played around with different prompts in the Prompt tab of the Image description dialog. Then to test out the result, I chose one of the food photographs from the table displayed in the browser, copied this to the clipboard, and then selected the Describe a single image in the clipboard button.
I iterated over several versions, testing with different food images from the book, until settling on this prompt:
You are an assistant trained to generate useful image descriptions for accessibility purposes.
Provide a concise and descriptive alt text for the image. Respond using warm, indulgent, and inviting language suitable for the sensuous photographs of dishes and ingredients in a cookery book. The descriptions should evoke pleasure and anticipation. Use vivid sensory language to make the reader “taste with their eyes”
Respond in English.
I then used the Describe all the images in an EPUB button to rerun the description process using the new prompt.
So now, instead of the description
“A plate with a piece of fried egg in toast next to a fork and knife, with a coffee maker and a cup in the background”
I now had
“Here is a mouthwatering glimpse of breakfast bliss: golden, toasted bread, its crust kissed with a hint of char, cradles a molten egg yolk, ready to spill its sunshine onto the plate. Fresh herbs and a dusting of cheese add a fragrant, savory note. Nearby, a steaming cup of espresso and a vintage moka pot promise a rich, aromatic start to the day. A yellow checkered napkin adds a touch of rustic charm to this tempting scene”.
And similarly styled descriptions throughout the book. This was much closer in style to what I was looking for. One final improvement I made was to include with some of the text near each of the images. The thought here was that the paragraphs before and after the image may include text that helps with the accuracy of the description. I added the following to the end of the prompt
When describing parts of the image you may find it useful to refer to the following text which is near the image in the cook book:
$context$
As the source document is processed, the text around the image is extracted. Before submitting the prompt to the AI, the keyword $context$ is replaced with the extracted text for that image. In most cases it wasn’t obvious that the text changed the generated description, but in some cases it did.
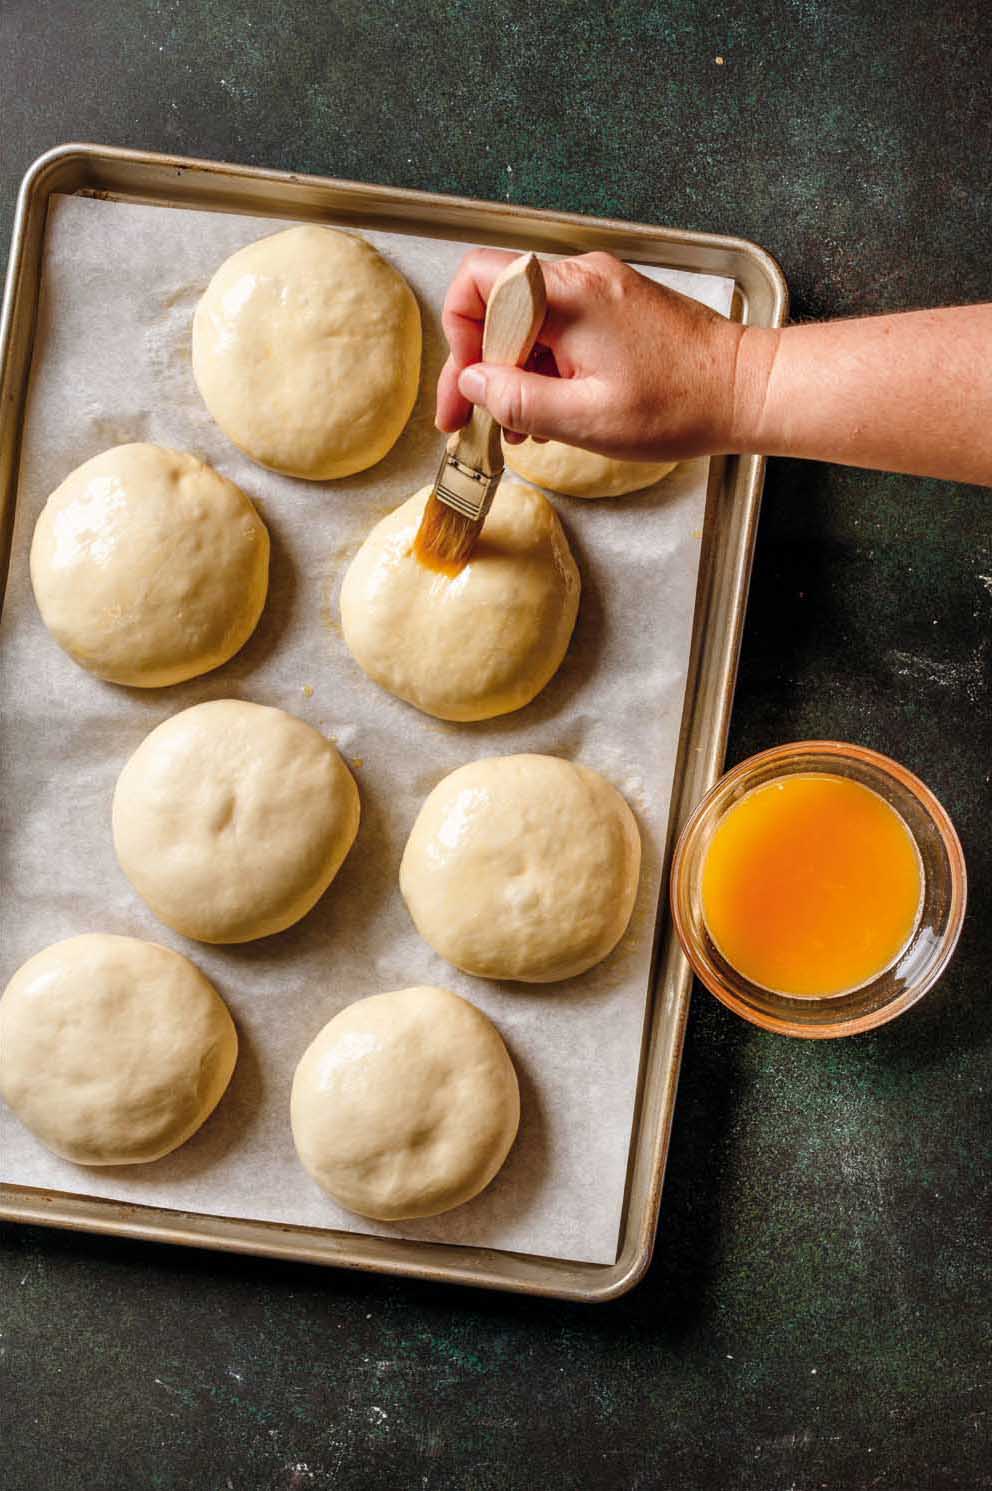
For example,
Golden, pillowy dough balls gleam on a parchment-lined baking sheet, awaiting their transformation in the oven.
became
Golden, pillowy hamburger buns, already boasting a tempting sheen from their egg wash, await their turn in the oven.
Because the AI knew about the recipe from the surrounding text. It was possible to observe more specific references to bagels and ingredients in other descriptions.
Unintended consequences
Whilst the food photographs gained more appropriate image descriptions, this wasn’t true of the other types of images. For example, the description of a QR code became
A delectable digital morsel! Scan this QR code to unlock a world of culinary delights and discover even more mouthwatering recipes.
We need unique prompts for different image types, which is where Fido’s image classification feature comes in. I enabled this in Settings by navigating to the Classifier tab and selecting the Enable image classifier feature checkbox.
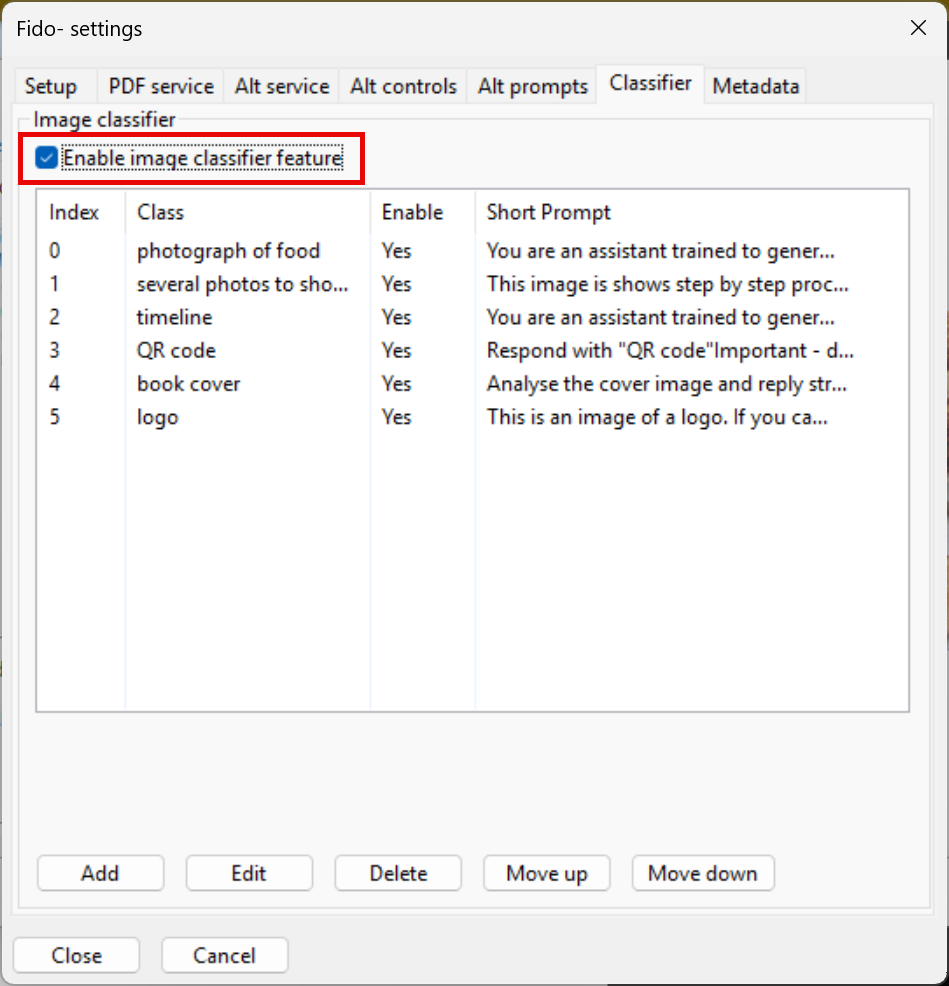
With this option set I can enter prompts for the different image types. I created a classification for photographs of food and entered the prompt I created in the previous step. I then added classifications for the other types of images. Using different samples from the table I then wrote, tested and refined prompts using the same technique as before. When I had a suitable prompt I then entered it for that image class.
My last steps in this process were to set the default prompt back to a generic version, and for backup purposes make a copy of the prompt file using Settings / Setup / Save prompts.
Let’s go through the prompts I developed for the different image classes.
Panels showing different steps
The EPUB contains several images that comprise multiple photographs showing a process or steps in a process.
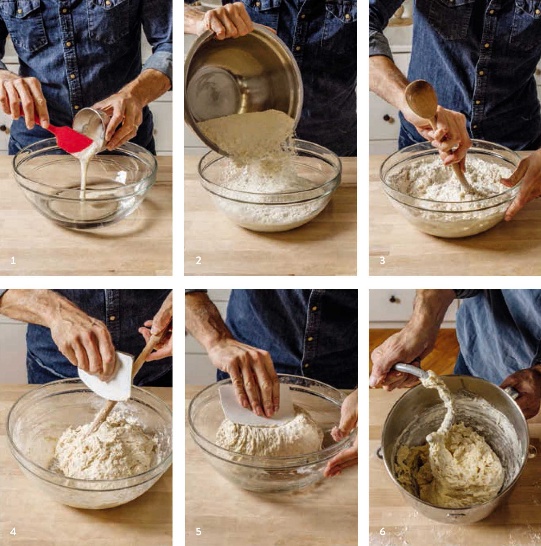
The original alt text for the image above was “Image”. The description generated by Fido’s default prompt was “A person is seen preparing dough in a glass bowl, using various tools and ingredients, in a sequence of six steps”.
The prompt that I ended up using was
This image shows step by step process. starting at the top left and finish at the bottom right, briefly describe what is happening in each of the panels. Here is an example of the desired output you will provide:
“Image panel contains 3 steps:
1. A person pours liquid from a metal container into a clear glass bowl, using a red spatula to scrape the container clean.
2. The person pours dry ingredients from a metal bowl into the glass bowl containing the liquid mixture.
3. The person mixes the ingredients in the glass bowl with a wooden spoon.”
Finally, when describing the image you may find it useful to refer to the following text which is near the image in the cook book:
$context$
Respond in English.
Using this prompt the description for the image above became
“Image panel contains 6 steps: 1. A person pours liquid from a metal container into a clear glass bowl, using a red spatula to scrape the container clean. 2. The person pours dry ingredients from a metal bowl into the glass bowl containing the liquid mixture. 3. The person mixes the ingredients in the glass bowl with a wooden spoon. 4. The person uses a plastic dough scraper to mix the dough in the glass bowl. 5. The person uses the dough scraper to fold the dough in the glass bowl. 6. The person uses a dough hook on a stand mixer to knead the dough in a metal bowl.”
Timeline (image #66)
Each of the recipes has a timeline image that gives time needed to mix, ferment, shape, rest, and bake, and the total time requirement.

The alt text in the original EPUB was “Image” which was replaced when using the Fido’s default prompt with
A timeline shows the steps and estimated times for making bread, including mixing, bulk fermentation, preshaping, a second rise, shaping, and baking.
By adjusting the prompt I was able to use the AI to extract the information from the timeline graphic and present this in a consistent way in the alt text. The prompt I used was
You are an assistant trained to generate useful image descriptions for accessibility purposes.
This image is a timeline that describes the time needed for steps in the baking process. Your task will be to describe the timeline. Here is an example of the desired output:
‘The total time for this recipe is about 3 hours. The stages are 10 minutes for mix, 1 hour 30 for bulk fermentation, 10 minutes for shape, 30 minutes for knead, 20 minutes for rest, 40 to 48 minutes for bake.’
Respond in English.
With this prompt the description for the image above became
The timeline describes the baking process which takes about 4 hours. The stages are mix for 10 minutes, bulk fermentation for 1 hour, preshape for 5 minutes, rest for 1 hour, shape for 30 minutes, and bake for 8-24 minutes. Making the preferment requires an additional 1 hour before the process begins.
QR Codes

The alt text in the original EPUB was “Image”. The alt text generated using Fido’s default prompt was “A square QR code composed of a grid of black and white modules, used to encode information that can be scanned by a digital device”. This description is long and doesn’t add much helpful information in this context.
Examining the EPUB I could see that the codes are followed in each case by a link to a video, which in practice is most likely to be what someone would use to watch the video. Nevertheless, someone may want to know there is a QR code there, but the alt text should not be extensive. I decided that the appropriate text should simply be “QR code” in each case.
Respond with ‘QR code’.
Important – do not add any additional text to the response, only reply with ‘QR code’.
This prompt was used to return the same image description text for the images classified as a QR Code. The second line was added because after working well several times, some AI models starting added some additional text such as “OK, here you are!”. Reinforcing the prompt seemed to resolve this issue.
Logos
The EPUB contains a few logos, for example this one from Instagram:
![]()
The alt text in the original EPUB was “Image” which was replaced when using the Fido’s default prompt with
“The Instagram logo is displayed, featuring a gradient of colors, including yellow, orange, red, purple, and white.”
I wanted use common practice approach that briefly and efficiently identifies the logos. Using the prompt
This is an image of a logo. If you can determine the company or brand it represents then respond according to the following pattern:
“Logo: <company name>”
and you can append additional text if there is any present in the image.
If you are unable to determine the company or brand, provide a brief visual description of the logo, preceded with the text “Logo: “. Important – do not add further embellishments, just use one of the two patterns given here.
Respond in English
The alt text became
“Logo: Instagram”
Book Cover
Included in the EPUB are exterior and inside covers for the book.
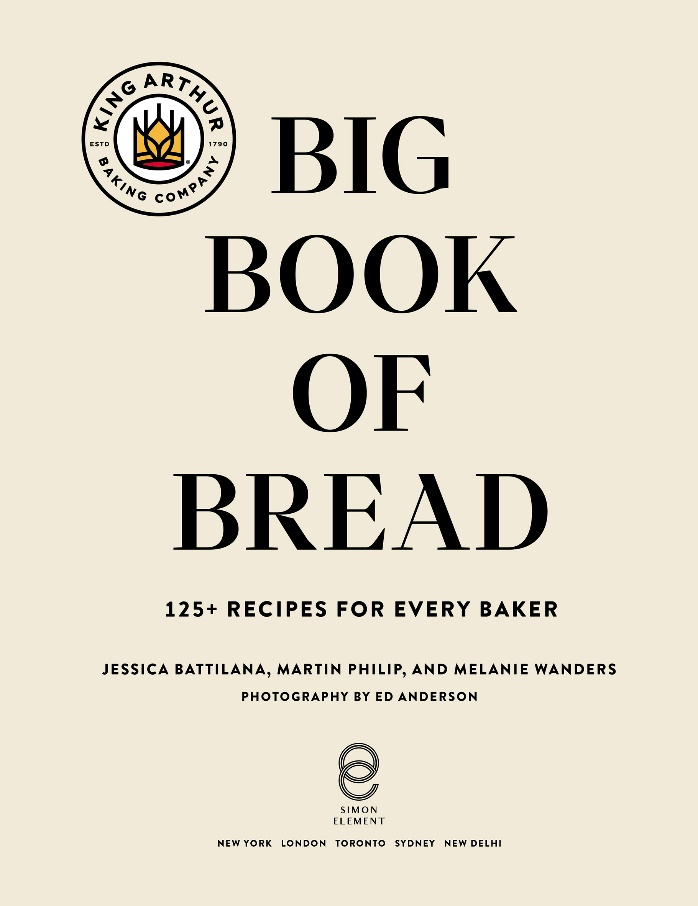
The alt text in the original EPUB was “Image” which was replaced when using the Fido’s default prompt with
The cover of the “Big Book of Bread” by King Arthur Baking Company features a cream-colored background with the title in large, bold letters, and includes the tagline “125+ Recipes for Every Baker.”
I wanted this to follow common practice for the alt text of cover images, so developed the prompt
Analyse the cover image and reply strictly following the example:
Cover image for “title of book”.
Subtitle (if present).
Author or authors (if present).
Publisher (if present).
Precede the publisher’s name with the text “Published by”. Do not describe the image. Do not include additional content to that given in the above image. Do not use all caps.
Respond in English.
The alt text became
Cover image for “big book of bread”. 125+ recipes for every baker. Jessica Battilana, Martin Philip, and Melanie Wanders. Published by Simon Element.
Finishing up
When I had created the prompts for the six image classifications, I ran the images description process to produce the final EPUB version. On a slow connection the process took 20 minutes, and the cost incurred from the Gemini Flash model was 14 cents.
I used the HTML table in the subfolder to do a quality review, looking for inappropriate or missing descriptions. Then for a complete workflow I would need to update the accessibility metadata, validate the EPUB with EPUBCheck, check for issues with Ace by DAISY, and check the reading experience in reading apps.
By conducting this exercise, I was able to upgrade the image descriptions in the book from “Image” to alt text that attempts to convey the gastronomic aesthetics of the food photographs, explains the step-by-step panels, and extracts the relevant information from the timeline graphics. If George was reliant on human volunteers to describe the 317 images in a recipe book, then he would most likely be waiting a while. The task became achievable using AI. The results using a single generic prompt were rather underwhelming, in my opinion. Customizing prompts significantly improved the quality of image descriptions.
The costs of using the AI capabilities was very modest. This allowed me to generate the descriptions multiple times, and iterative testing and refinement of prompts was essential.
Including contextual information from the surrounding text enhanced the accuracy of image descriptions. This could be especially powerful when working with education content.
I learned a lot as I went, and crafting the prompts became faster and more effective as I progressed through the different classes of image.
As mentioned in the disclaimer at the top of this article, the image descriptions I generated may not be what you would have done. You may not attempt a cookery book but are focussed on education titles. Nevertheless, perhaps the explanation of the steps and features given in this article might be useful for your experiments with AI generated image descriptions with the content you are working with.
Postscript
I have occasionally returned to this workflow as we learn more about the capabilities of AI models and we extend the capabilities of the Fido AI tool. Here are some observations since writing the original article:
- Using customised prompts for the different image types was key to getting a good result. I used the image classification feature in Fido AI to do this, but it is also possible to achieve this by combining them into one prompt. There are a few advantages if you employ the approach used in Fido but the single prompt approach is certainly an option.
- I ran the image description process using high end models (eg Gemini Pro 2.5) and regular models (eg Gemini Flash 2.5) and some of the free models via OpenRouter (eg Qwen 72B) and I got good results. At this point I am not so sure about the data security of the free models so limited my testing there. For ultimate contol over data we can run local models. We’re testing this image description workflow as we add support for Ollama and LM Studio.
This article references the Big Book of Bread and reproduces select images for educational purposes.