
DAISY Pipeline Desktop Application Quick Start Guide
The DAISY Pipeline app is a easy-to-use desktop application for the powerful DAISY Pipeline engine. It is an open-source, cross-platform framework and user interface for the automated processing of digital content in and between various file formats. It intends to facilitate the production and maintenance of accessible content for people with print disabilities.
DAISY Pipeline is led and maintained by the DAISY Consortium and involves several member organizations. Notable file formats that DAISY Pipeline evolves around are EPUB, DAISY, PEF and eBraille.
Features
- Scripts for frequently required format conversions such as DAISY 2.02 to EPUB, DTBook to DAISY 3
- New script for converting Word document to DTBook XML
- Scripts for converting DAISY books to audio files for the Vine Players and unscrambling DAISY 2.02 books to MP3 files.
- DAISY Pipeline can use high quality Text-to-Speech cloud voices from Microsoft Azure, Google Cloud and Amazon Poly to generate audio for the given text. As an example, a DTBook XML file can be converted to multi-media DAISY 3 book with narration in the chosen Microsoft Azure or Google TTS voice
- Validation scripts for DAISY, DTBook, EPUB and NIMAS files
- Multiple jobs can be run in the tabbed interface
- It has an accessible user interface with basic keyboard shortcuts. For screen reader users, navigation is similar to reading web pages. A high contrast dark mode is also available
- To check for updates click on ‘Check for updates’ in the ‘About DAISY Pipeline’ window which can be opened from the Help menu
Download and install
DAISY Pipeline app can be installed on Windows and macOS.
- Download the DAISY Pipeline desktop application for Windows
- Download the DAISY Pipeline desktop application for macOS
Overview of the User Interface
DAISY Pipeline has a menu bar at top. The File, Edit, View, Goto and Help drop down menus can be accessed with the mouse and keyboard like other applications.
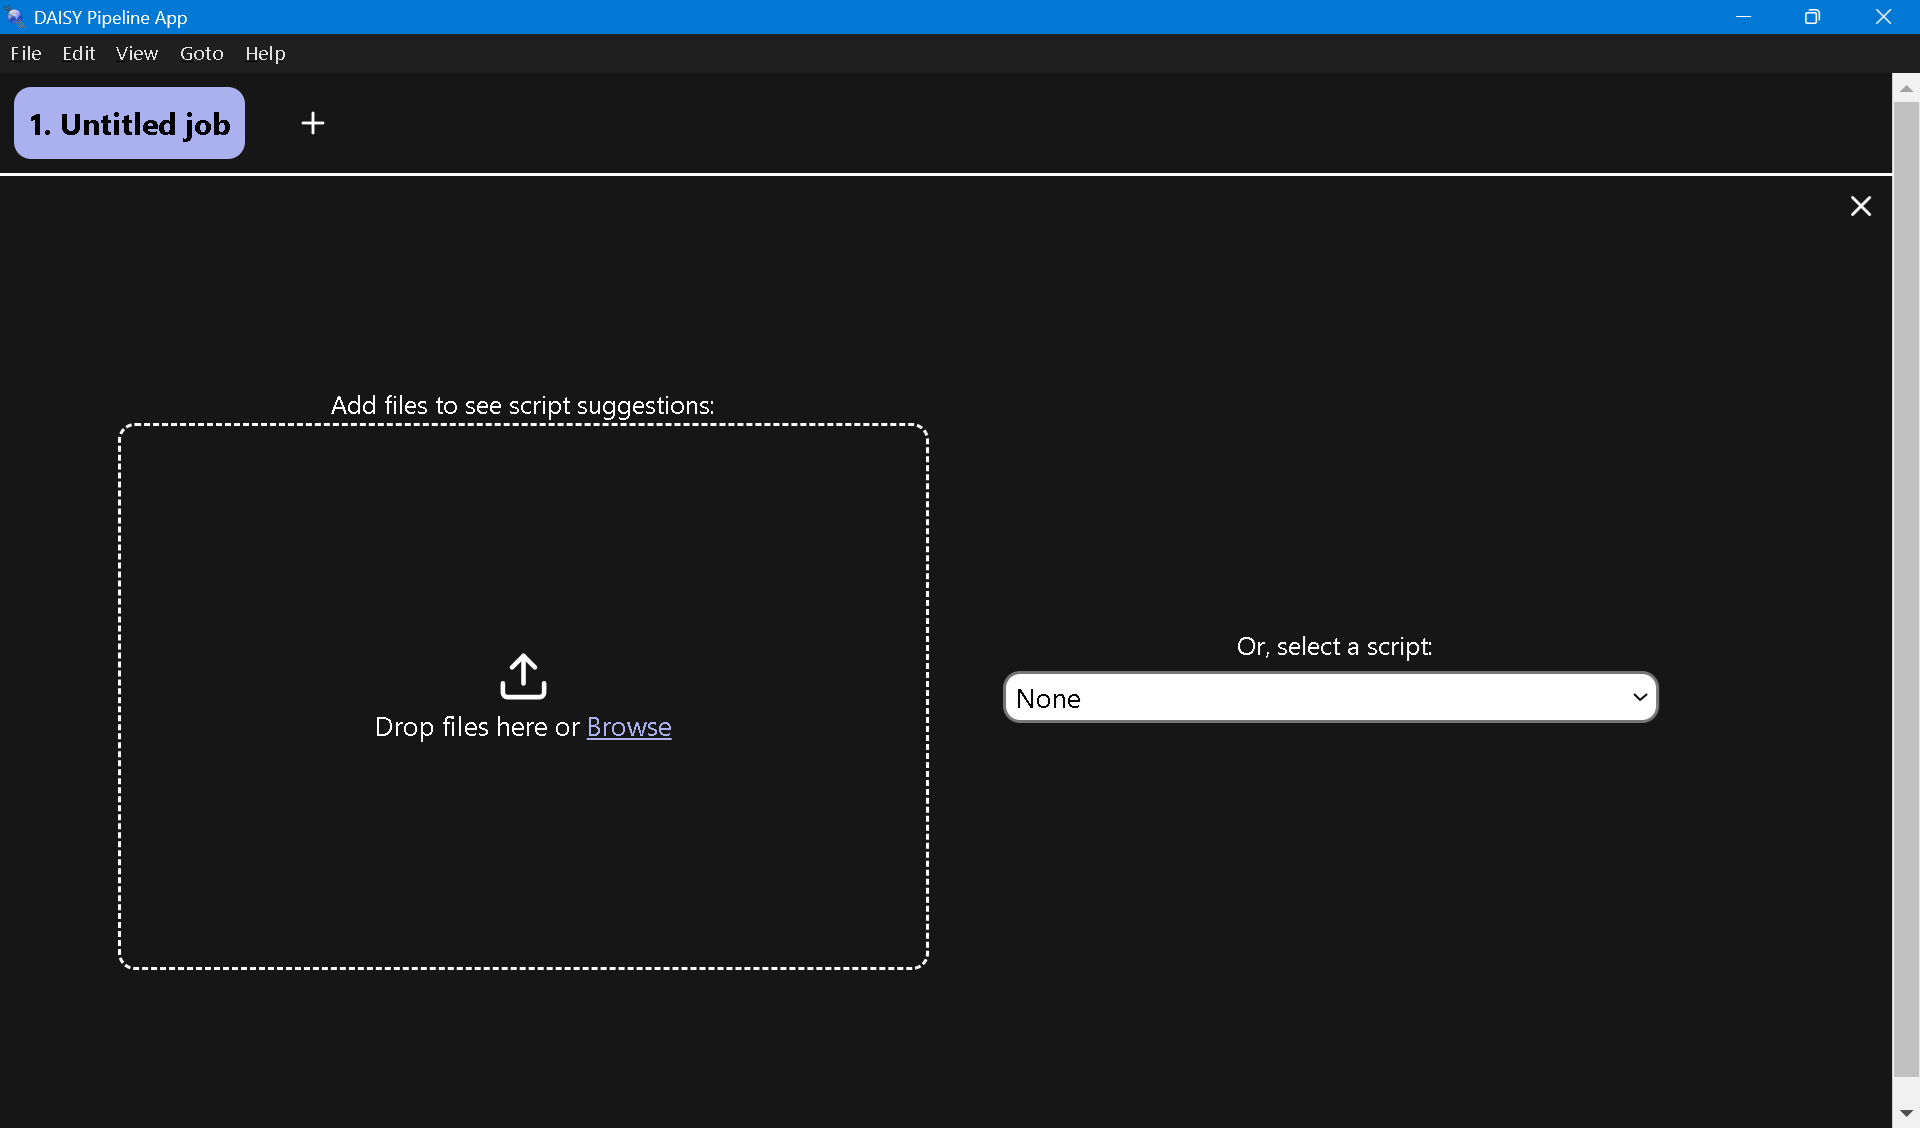
Below the menu is the tab control area. By default there is only one tab and a “+” shape button for adding more tabs. New conversion jobs can be created in different tabs and can be run in parallel.
In each tab there is a large area for dropping files for conversion. Alternatively, the Browse link can be clicked to select files for conversion. The app prompts for various scripts that are available for the selected file type.
There is also a “Select a script” drop down list which can be used instead of dropping or browsing for files at the first instance.
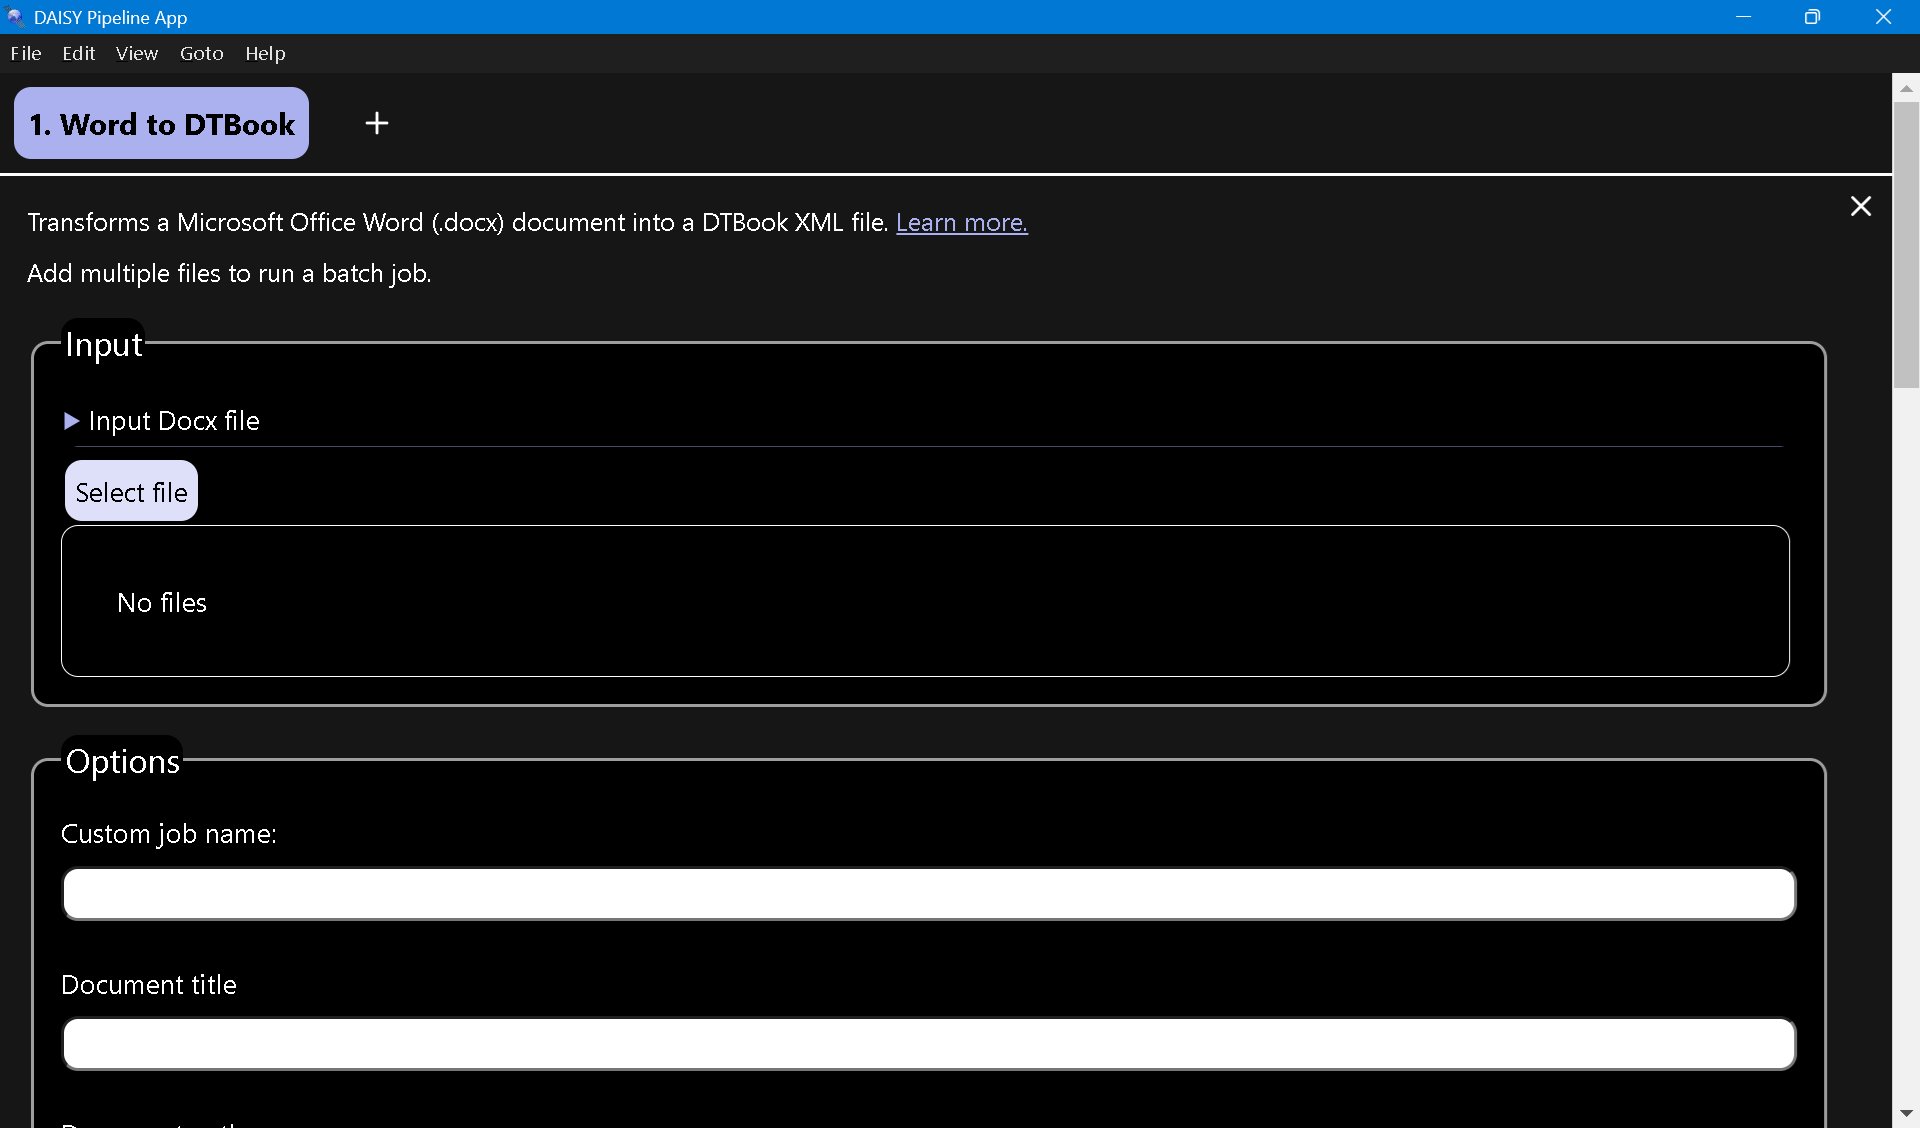
The Pipeline screen changes when a file is dropped or a script is selected. After selecting a script you will see a short description of what it does at the top of window with a link labelled as “Learn more” to know more about the selected script.
Below the description is a form to configure the script. It has “Browse button” to select the input file. After a file has been selected, the file path and name is displayed on the side of the Browse button.
Depending on the selected script there may be an “Options” section which has various fields to be completed. The name and number of fields in this section varies for each script.
There is a “Run” button at the bottom of the window to start the conversion process.
Note that the Job tab name changes to the name of the selected script.
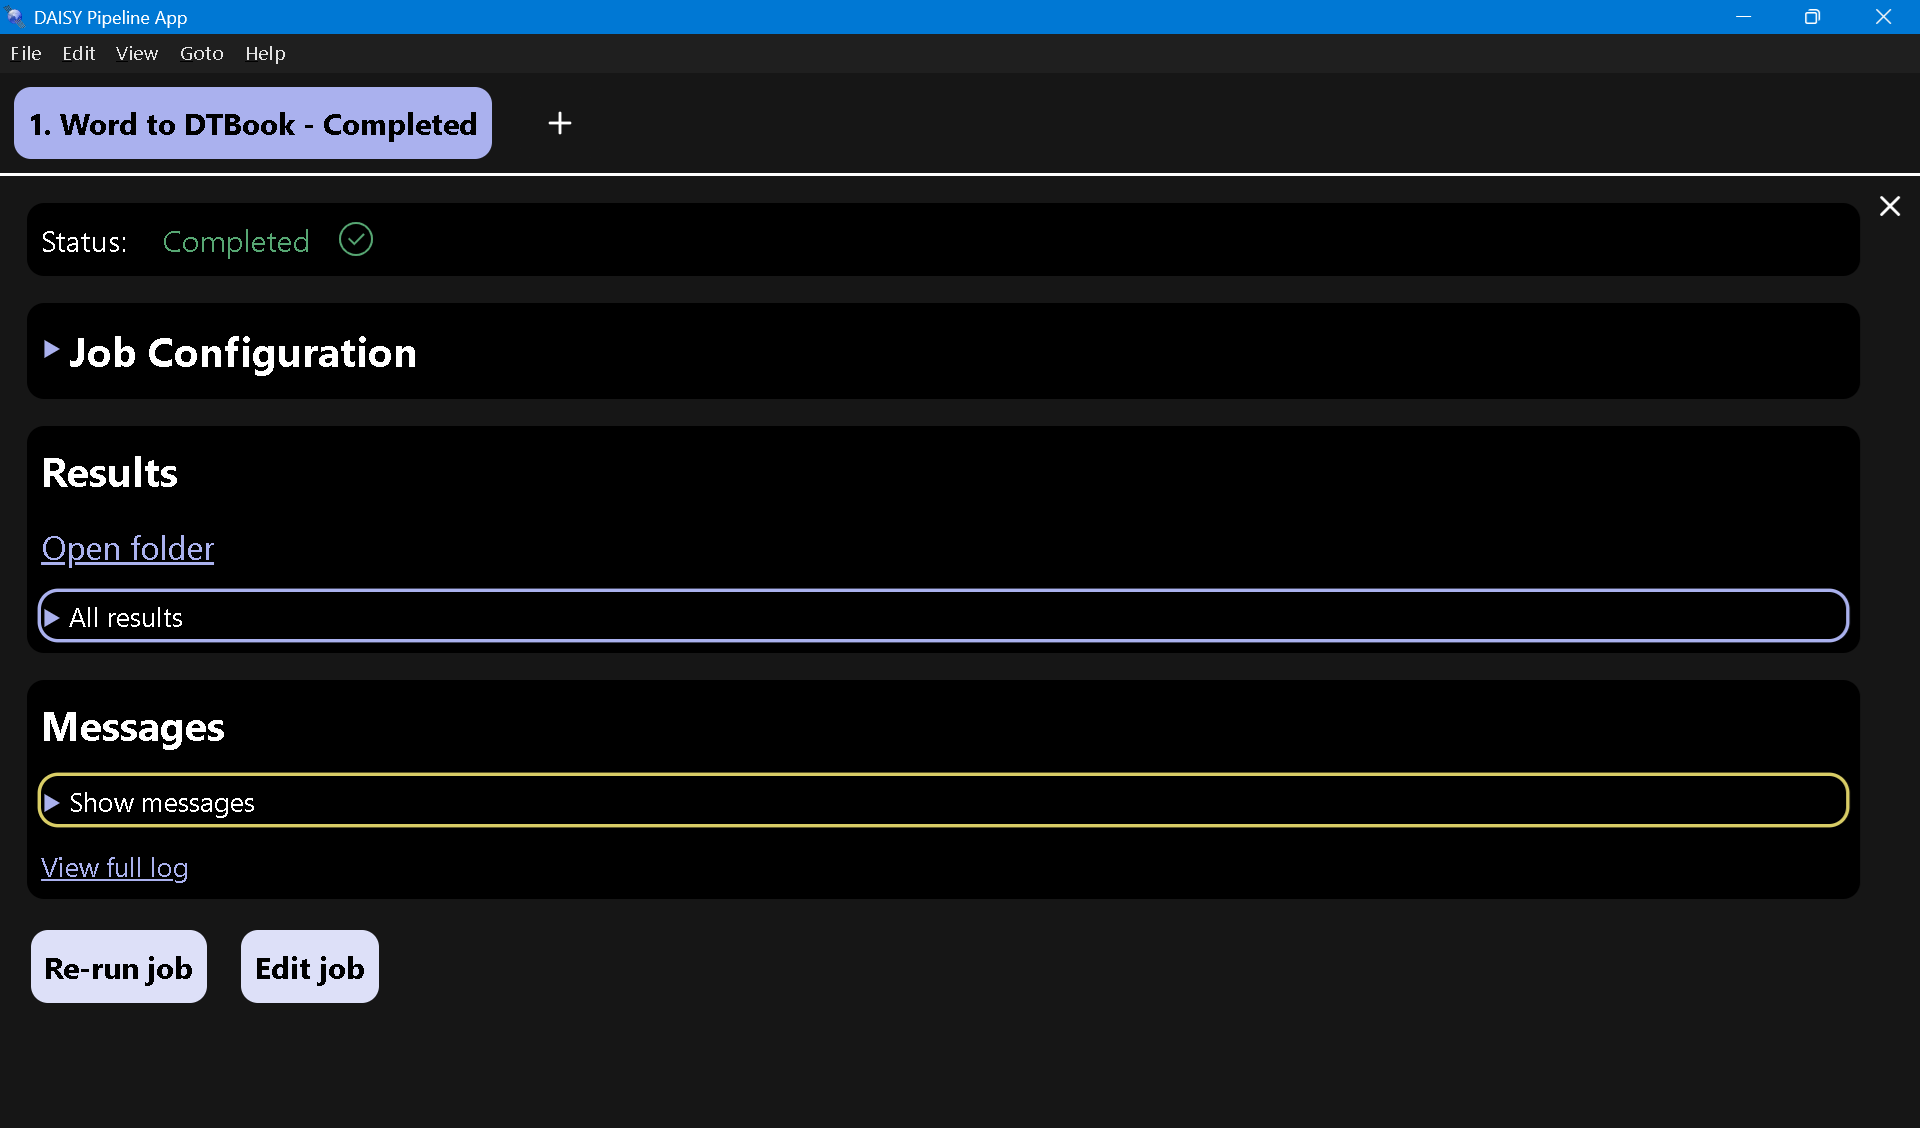
On running a script, “Job status” is shown at the top. It can read “Running” or “Error” or “Completed”.
When the job is completed, the DAISY Pipeline window displays three sections, namely:
- Job configuration – Displays the input file name and options selected for the job
- Results – Contains links to Validation report, log and output folder
- Messages – Displays various progress messages of the script
Using the DAISY Pipeline app
- Start the Pipeline app and wait for the Pipeline engine to start
- Now there are two ways to start the conversion process.
- Drop the input file in the Pipeline window or click browse and select the input file. Pipeline will list the scripts which can be used with the input file. Select the desired script.
- Directly choose a script from the list box.
- Depending upon the selected script, several options are presented for customizing the conversion. Ensure that all the mandatory fields are filled up.
- Run the job and observe its progress and results
- Click the “Show results folder” if the conversion is completed successfully to view the output.
Settings
The job results are automatically save in the folder named “DAISY Pipeline results” in the Documents folder. You can change the default folder in Settings. To do this, go to the File menu and click on Settings. The Settings window opens as seen below.
The DAISY Pipeline Settings window has the following tabs:
- TTS engines: This tab should be used first before starting any script that uses TTS or text-to-speech. In this tab you can configure the Microsoft Azure, Google Cloud and Amazon Poly TTS services. You will need to register with them and obtain API keys and input them in this Pipeline screen. The status of connectivity with these TTS services can also be checked in this tab.
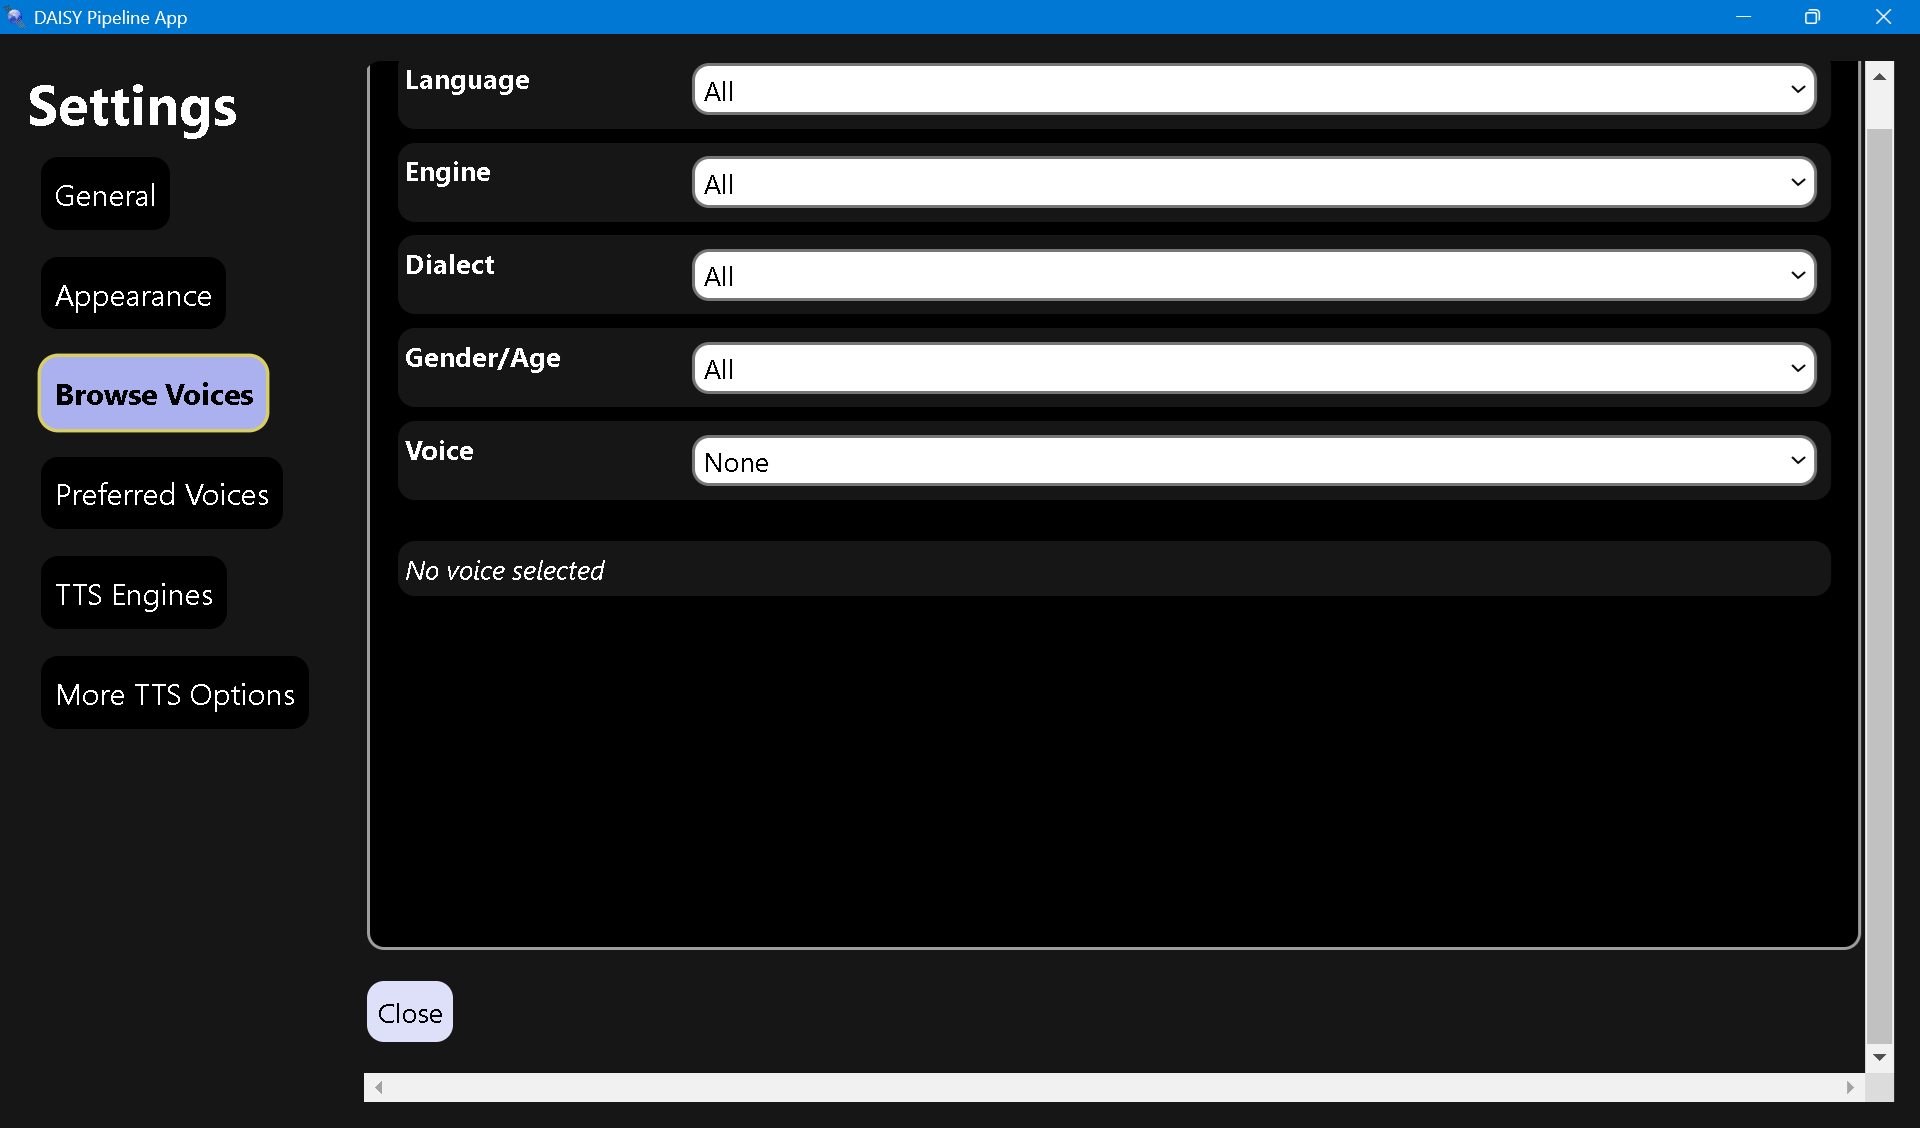
- Browse voices: In this tab you can browse voices available from different services for different languages. You can also play and listen to check the quality of the selected voice. Make sure to click “Add to Preferred voices” when you find a voice that you like.
- Preferred voices: This tab will list the voices you have selected in the “Browse voices” tab. Here you can select default voice for different languages. This becomes relevant when you select more than one TTS voice for a language.
- More TTS settings: In this tab you can configure TTS Speech Rate, MP3 bit rate and Sampling rate. If you are not sure, you can leave them at default values. Lexicon files can also be selected for use during conversion in this tab.
- Appearance: Choose the user interface color mode either Dark mode or Light mode.
- General: Here you can change the default folder for saving Pipeline output. Here you can also choose what will happen on closing the app window. The options are: Keep running in the system tray, Close the application or Ask while closing the app.
- Click on Close button to save your selected choices
Keyboard shortcuts
Windows
- Control + N to add a new job
- Control + R to run a job
- Control + Tab and Shift + Control + Tab to move between jobs
- Control + Alt + 0-9 to access the first 10 tabs quickly (1 = first tab, 0 = tenth tab)
- Shift + Control + I to get job status
- Control + D to close a job
- Control + W to close the window
- Control + , to open the settings dialog
- Control + E to edit a job
- Control + = to zoom in
- Shift + Control + = to zoom out
- Alt + Shift + Control + = to reset the zoom level
Mac
- Command + N to add a new job
- Command + R to run a job
- Control + Tab and Shift + Control + Tab to move between jobs
- Command + Alt + 0-9 to access the first 10 tabs quickly (1 = first tab, 0 = tenth tab)
- Shift + Command + I to get job status
- Command + D to close a job
- Command + W to close the window
- Command + , to open the settings dialog
- Command + E to edit a job
- Command + + to zoom in
- Command + – to zoom out
- Command + 0 to reset the zoom level
See also
- Convert inaccessible print materials to Word formats
- Make Word documents more accessible
- Using Lexicon in DAISY Pipeline
- Convert Word document to DAISY audio Book
- Convert accessible Word to EPUB
- Convert Word document to DTBook XML to create multiple formats including braille
- Use high quality TTS to record text